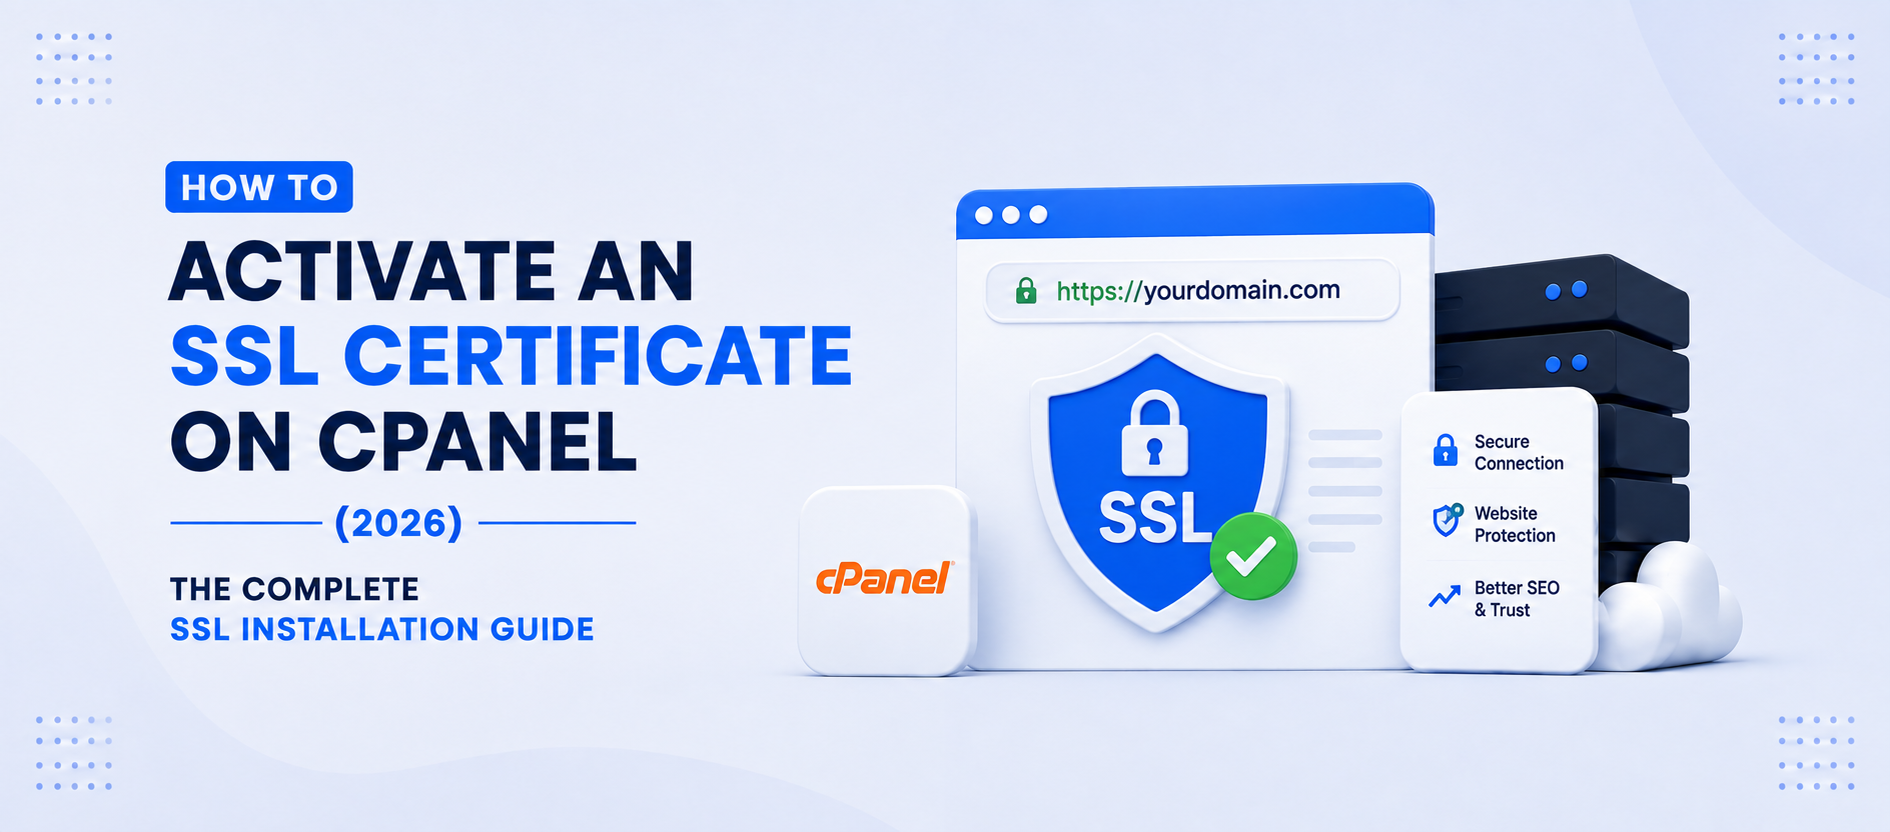

An SSL certificate is one of the first things you should enable after connecting your domain to your hosting account. It encrypts the connection between your website and its visitors, protects sensitive information, improves your search engine rankings and enables HTTPS.
Website security is no longer optional. Whether you run a business website, an online store, or a personal blog.
In most cases, your SSL certificate will be installed automatically within 15–20 minutes once your domain’s DNS points to hosting server and the DNS has fully propagated.
However, if the certificate isn’t installed automatically, you can easily install it yourself using the SSL/TLS Wizard inside cPanel.
What is an SSL Certificate?
An SSL (Secure Sockets Layer) certificate encrypts the communication between your website and its visitors.
Once installed, your website changes from:
http://yourdomain.comto
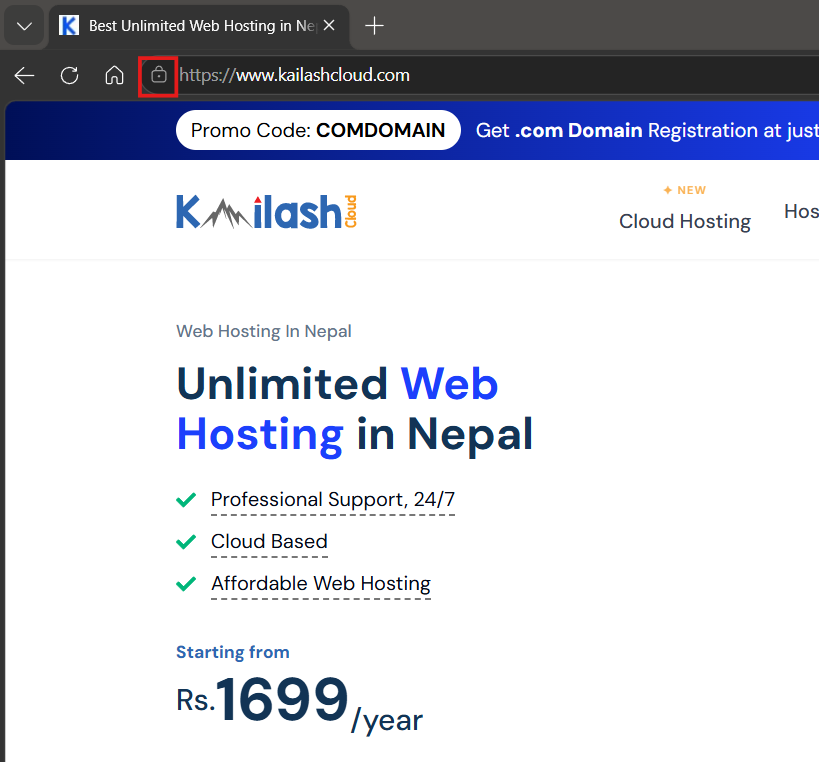
https://yourdomain.comVisitors will also see the padlock icon in their browser, indicating that the connection is secure.
Benefits of SSL
- Protects customer information
- Encrypts login credentials
- Builds visitor trust
- Improves SEO rankings
- Required for online payments
- Prevents browser security warnings
Before You Begin
Before installing SSL manually, ensure:
- Your hosting account is active.
- The domain has been added to your cPanel account.
- Your domain points to the correct hosting server.
- DNS propagation is complete.
Note: You can check DNS propagation status through: DNSChecker
After this, open your website and wait for Automatic SSL Installation. If the secure padlock appears, your SSL certificate has already been installed successfully.
If SSL has not been installed automatically after waiting, you can install it yourself in just a few minutes.
Step 1: Log in to cPanel
Option 1 (Recommended)
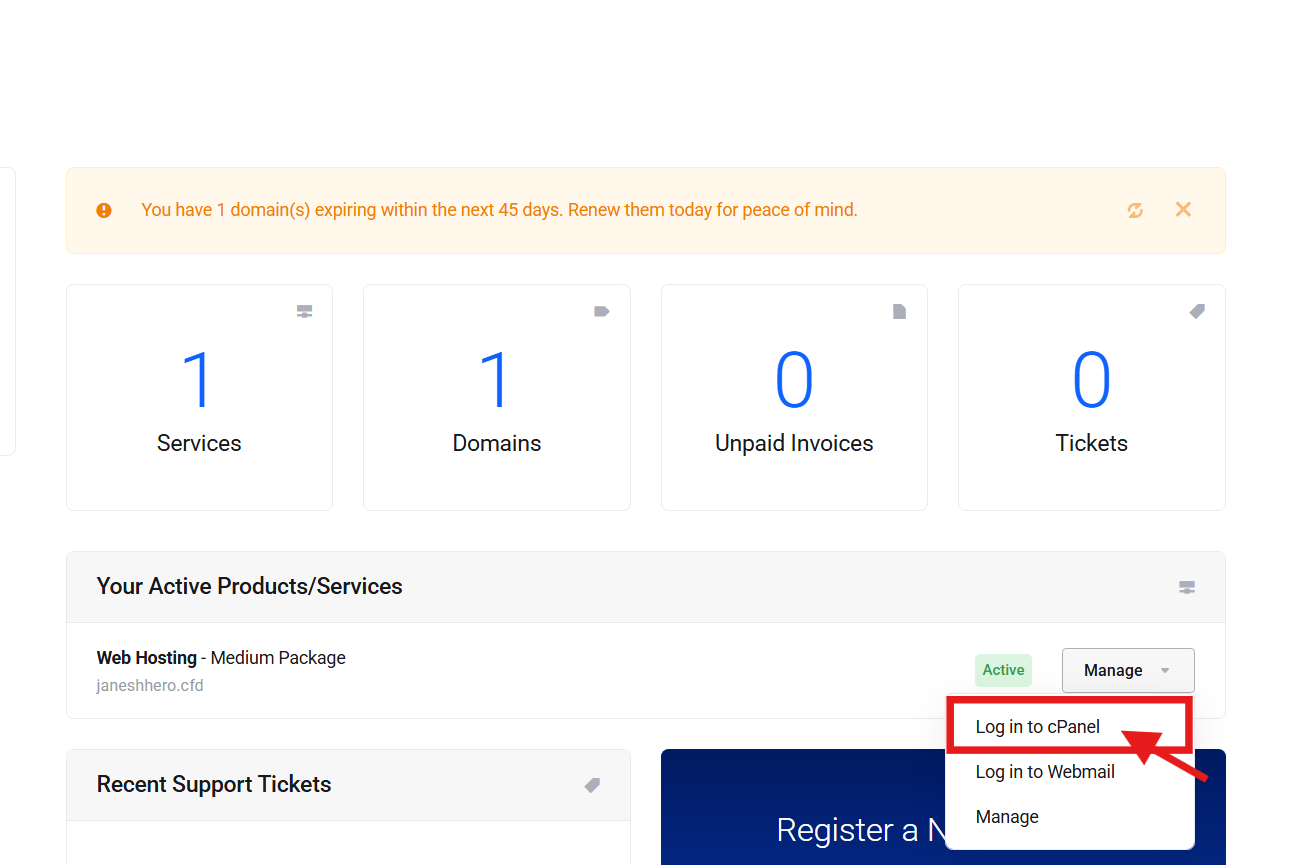
Firstly log in to your Client Area then Navigate to:
Services → Manage → Log in to cPanel
Option 2
Open your browser and visit:
https://yourdomain.com:2083Then log in using your cPanel username and password.
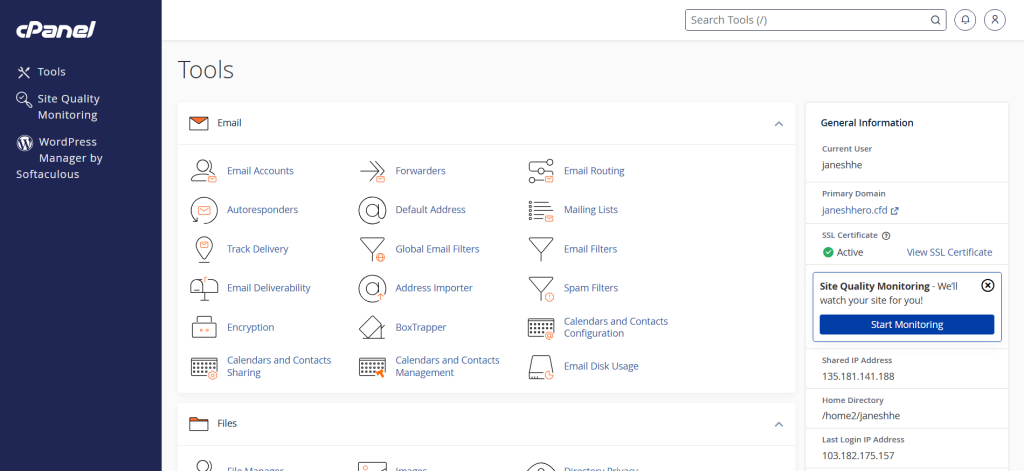
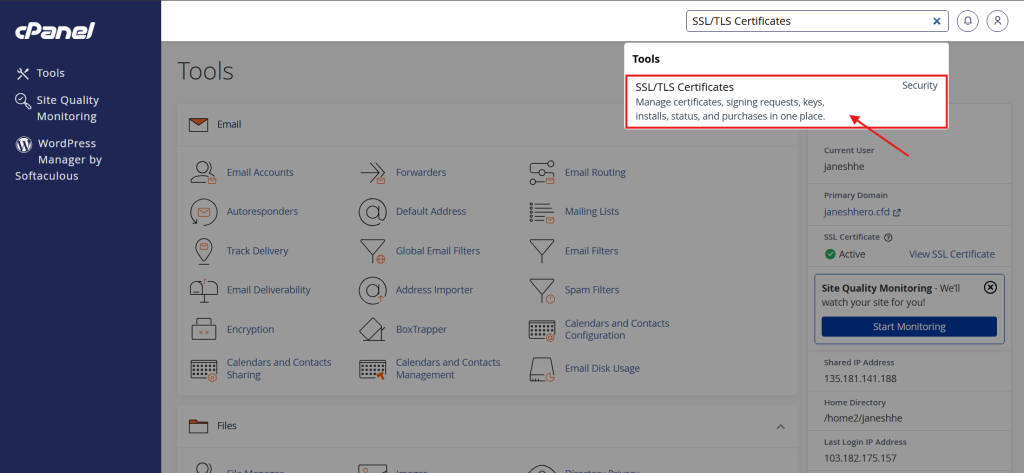
Step 2: Open SSL/TLS Certificates
Once you’re inside cPanel, similar screen you’ll see:
Search For SSL/TLS Certificates in the Search box at top right side.
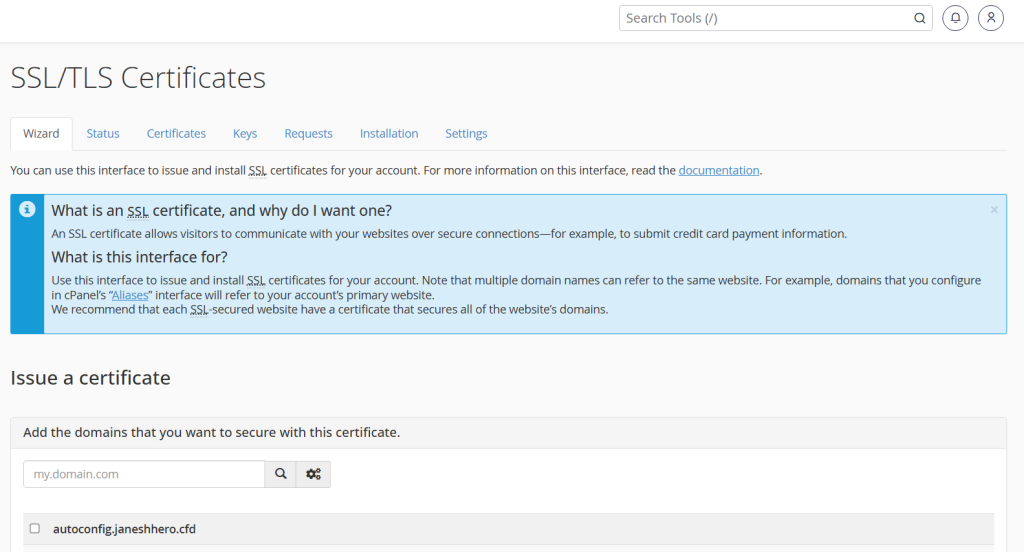
Then you’ll be at SSL/TLS Certificates Page.
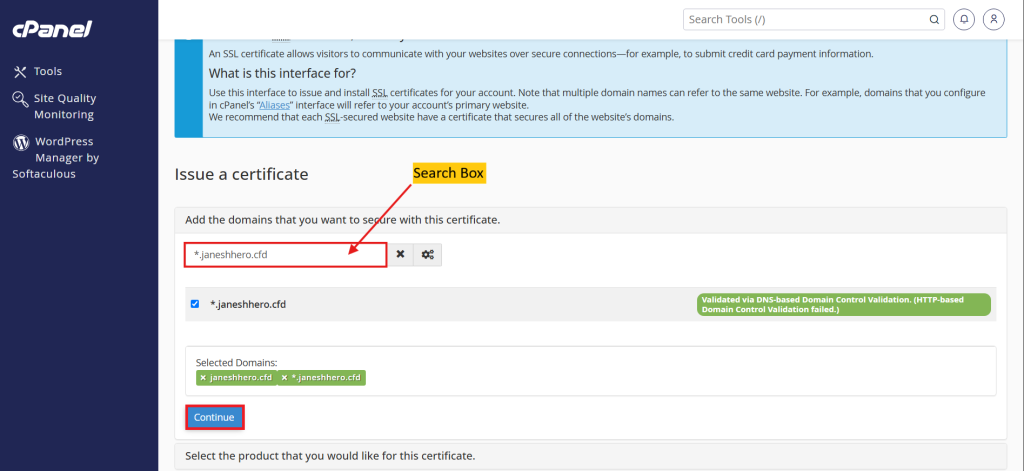
Step 3: Search for Your Domain
From the Wizard tab.
This wizard allows you to issue and install SSL certificates for your domains.
In the search box:
- Enter your domain name.
- Select the domain (or multiple domains) that you want to secure.
Click Continue.
Step 4: Choose Let’s Encrypt Certificate
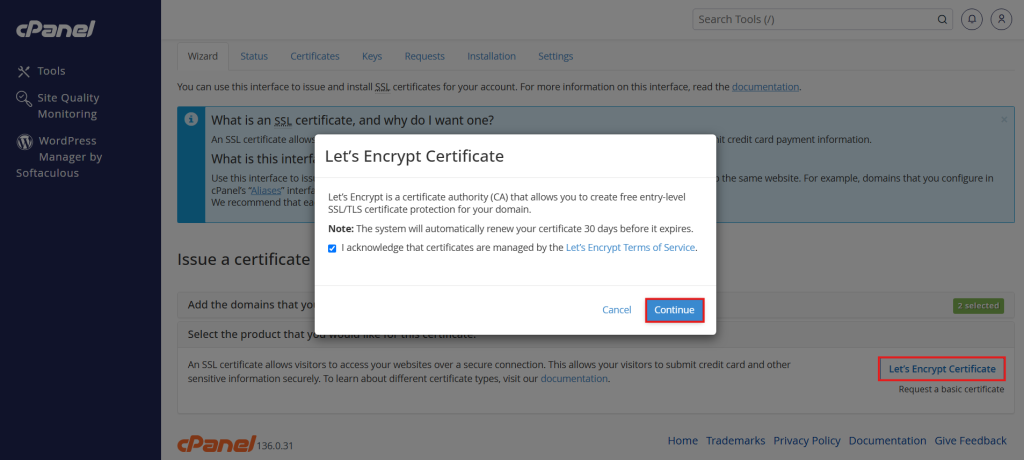
Click Let’s Encrypt Certificate and Tick the confirmation checkbox then Click Continue. The SSL request will now be submitted.
Step 5: Wait for Installation
The certificate is usually installed within a few minutes.
Once complete, visit:
https://yourdomain.comIf the padlock icon appears as shown First image , your SSL certificate is active.
What to Do If the Padlock Icon Doesn’t Appear
If you’ve waited for the SSL certificate to be installed and your website still doesn’t display the secure padlock icon, the SSL may already be active. In many cases, the issue is simply caused by your browser or website serving cached content.
Before assuming there’s a problem with the SSL certificate, try the following:
- Clear your browser’s cache and cookies.
- Open your website in an Incognito or Private browsing window.
- Wait another 10–15 minutes, as HTTPS changes may take a little longer to reflect after the certificate has been issued.
Then, revisit your website.
Common SSL Errors and Their Solutions
SSL Certificate Is Not Issued
Possible causes
- DNS has not fully propagated.
- The domain is not pointing to the correct hosting server.
Solution
Wait until DNS propagation completes and try issuing the certificate again.
Domain Is Not Listed in the SSL Wizard
Possible causes
- The domain has not been added to your hosting account.
- DNS records are incorrect.
Solution
Add the domain in cPanel (or as an addon domain if applicable) and verify the DNS settings.
Website Still Opens with HTTP
Possible causes
- HTTPS redirection is not enabled.
- Browser cache is showing the old version.
Solution
Enable HTTPS redirection, clear your browser cache, and reload the website.
Frequently Asked Questions
How long does SSL installation take?
After DNS propagation, SSL is usually issued automatically within 15–20 minutes.
Do I need to install SSL manually every time?
No. In most cases, the system installs SSL automatically. Manual installation is only needed if the automatic process doesn’t complete.
Can I install SSL for multiple domains?
Yes. The SSL/TLS Wizard allows you to select and secure multiple domains, provided they are hosted within your cPanel account. Such as addon domains and subdomains you’ve created in cPanel.
Why isn’t my website showing HTTPS immediately?
DNS propagation may still be in progress. Wait a little longer and then try accessing your site again.