
WordPress is one of the easiest ways to create a professional website, business site, online store, portfolio, or blog. However, before you can choose a theme or publish your first page, you need to install WordPress on your hosting account.
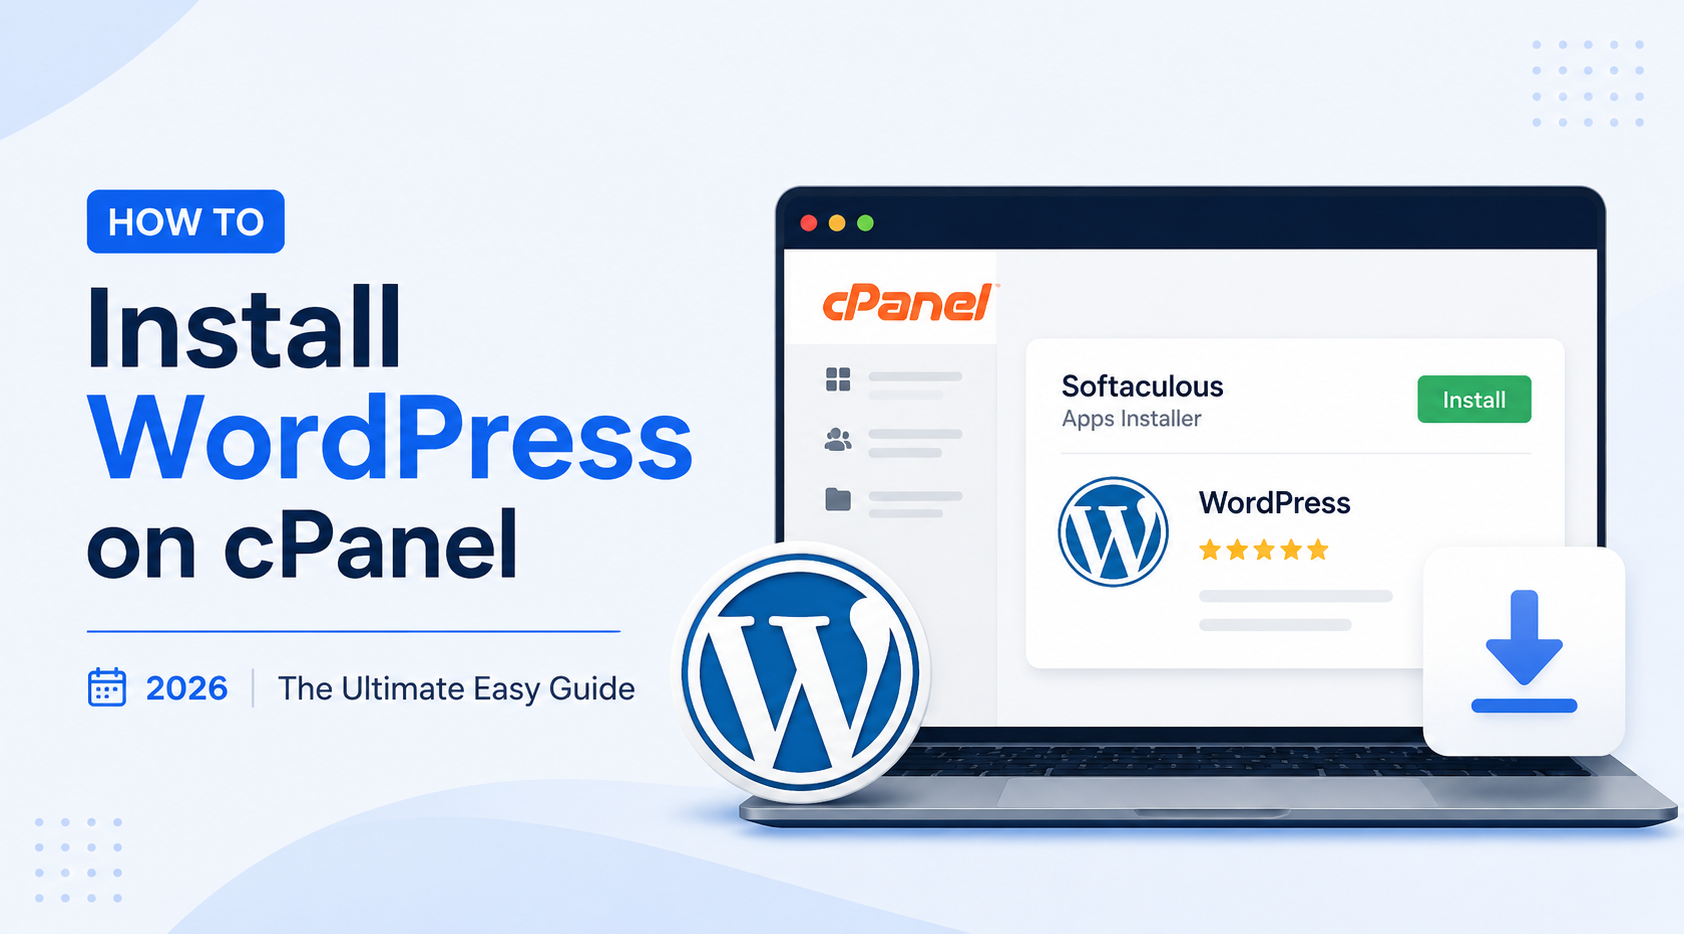
The good news is that installing WordPress does not require advanced technical knowledge. If your cPanel hosting includes Softaculous, you can complete the installation through a simple setup form. Softaculous automatically downloads WordPress, creates the database, connects the required files, and prepares your website for use.
In this guide, you will learn how to install WordPress on cPanel using Softaculous. We will also explain the manual installation method in case you need more control or cannot access the automatic installer.
By the end of this guide, your WordPress website will be ready for customization, content creation, and publishing.
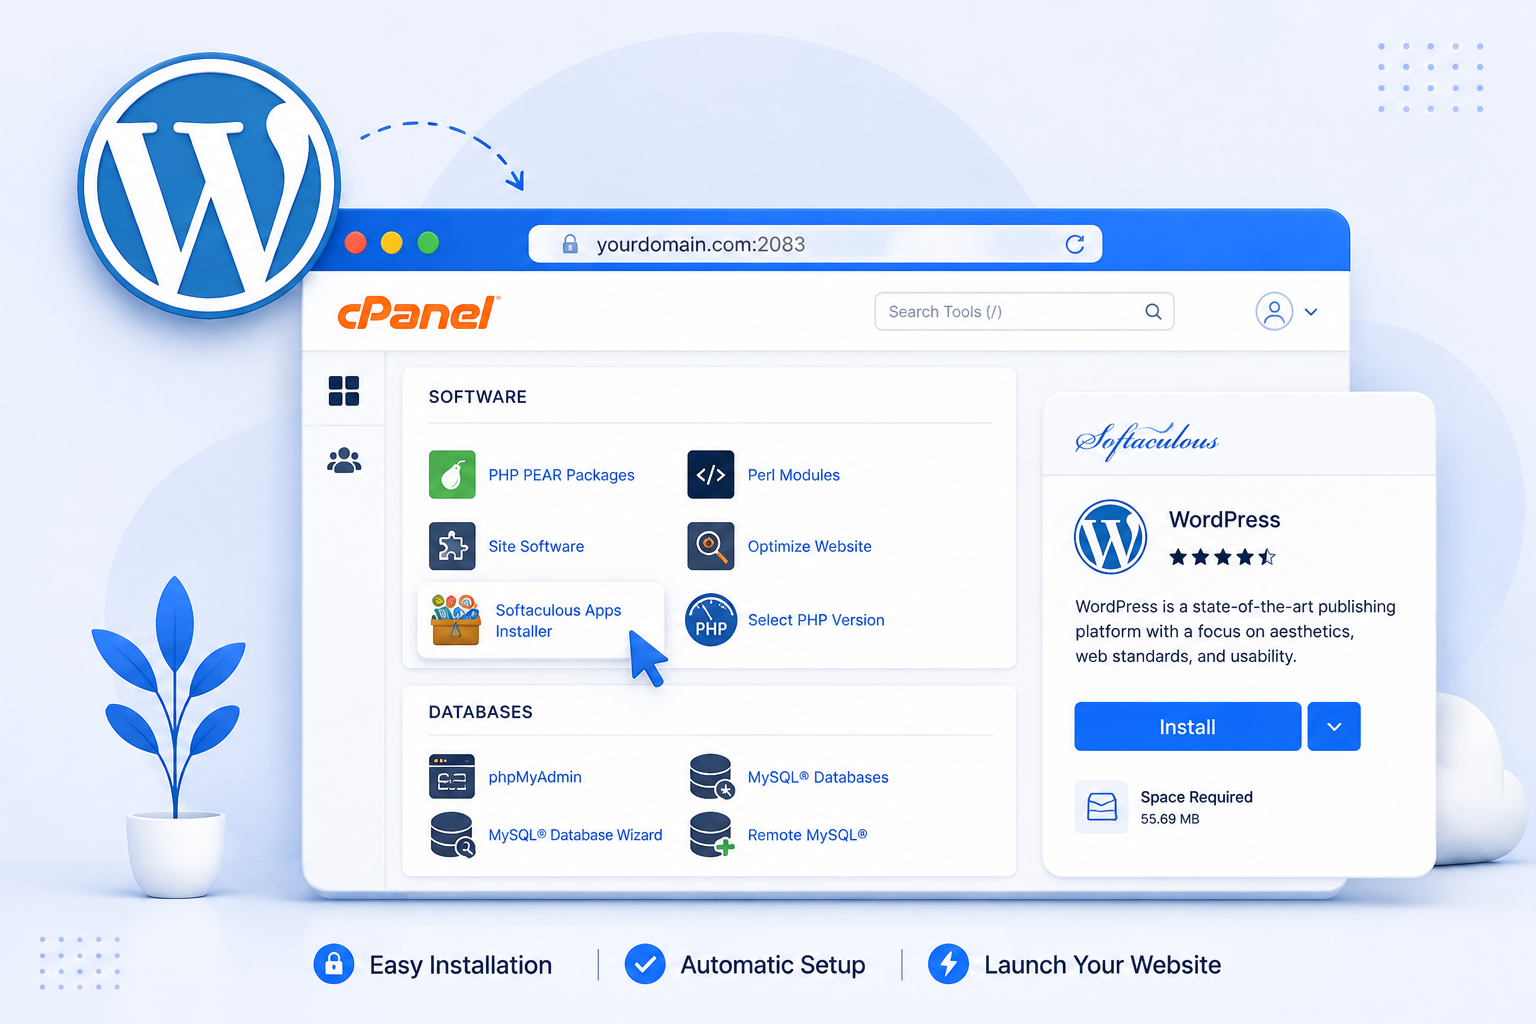
Quick Answer
To install WordPress on cPanel using Softaculous:
- Log in to cPanel.
- Open Softaculous Apps Installer.
- Select WordPress.
- Click Install Now.
- Configure Software Setup & Directory.
- Configure Site Settings.
- Choose Protocol: Select
https://orhttps://www.. - Choose Domain: Pick your target domain name from the dropdown.
- In Directory: Clear out the default
wptext so the field is completely empty. Leavingwpin this field will force your site to load atyourdomain.com/wpinstead of your root homepageyourdomain.com.
- Choose Protocol: Select
- Create an administrator account.
- Set a strong Admin Username, Admin Password, and enter a valid Admin Email.
- Click Install.
After installation, you can access your WordPress dashboard at:
https://yourdomain.com/wp-adminWhat You Need Before Installing WordPress
Before starting the installation, make sure you have:
- An active domain name
- A web hosting account with cPanel
- Access to your cPanel dashboard
- A domain connected to your hosting account
- An active SSL certificate
- A working email address
Your domain should already point to the correct hosting server. If it does not open or shows a DNS error, check the nameservers assigned to your domain through DNSchecker.
You should also check whether your website opens securely with HTTPS:
https://yourdomain.comIf the domain does not open with HTTPS, activate the SSL certificate before launching the website.
Method 1: Install WordPress Using Softaculous (Recommended)
Softaculous is an application installer available with many cPanel hosting accounts. It lets you install WordPress without manually downloading files or creating a database.
The installer also provides options for automatic updates, backups, staging and WordPress management.
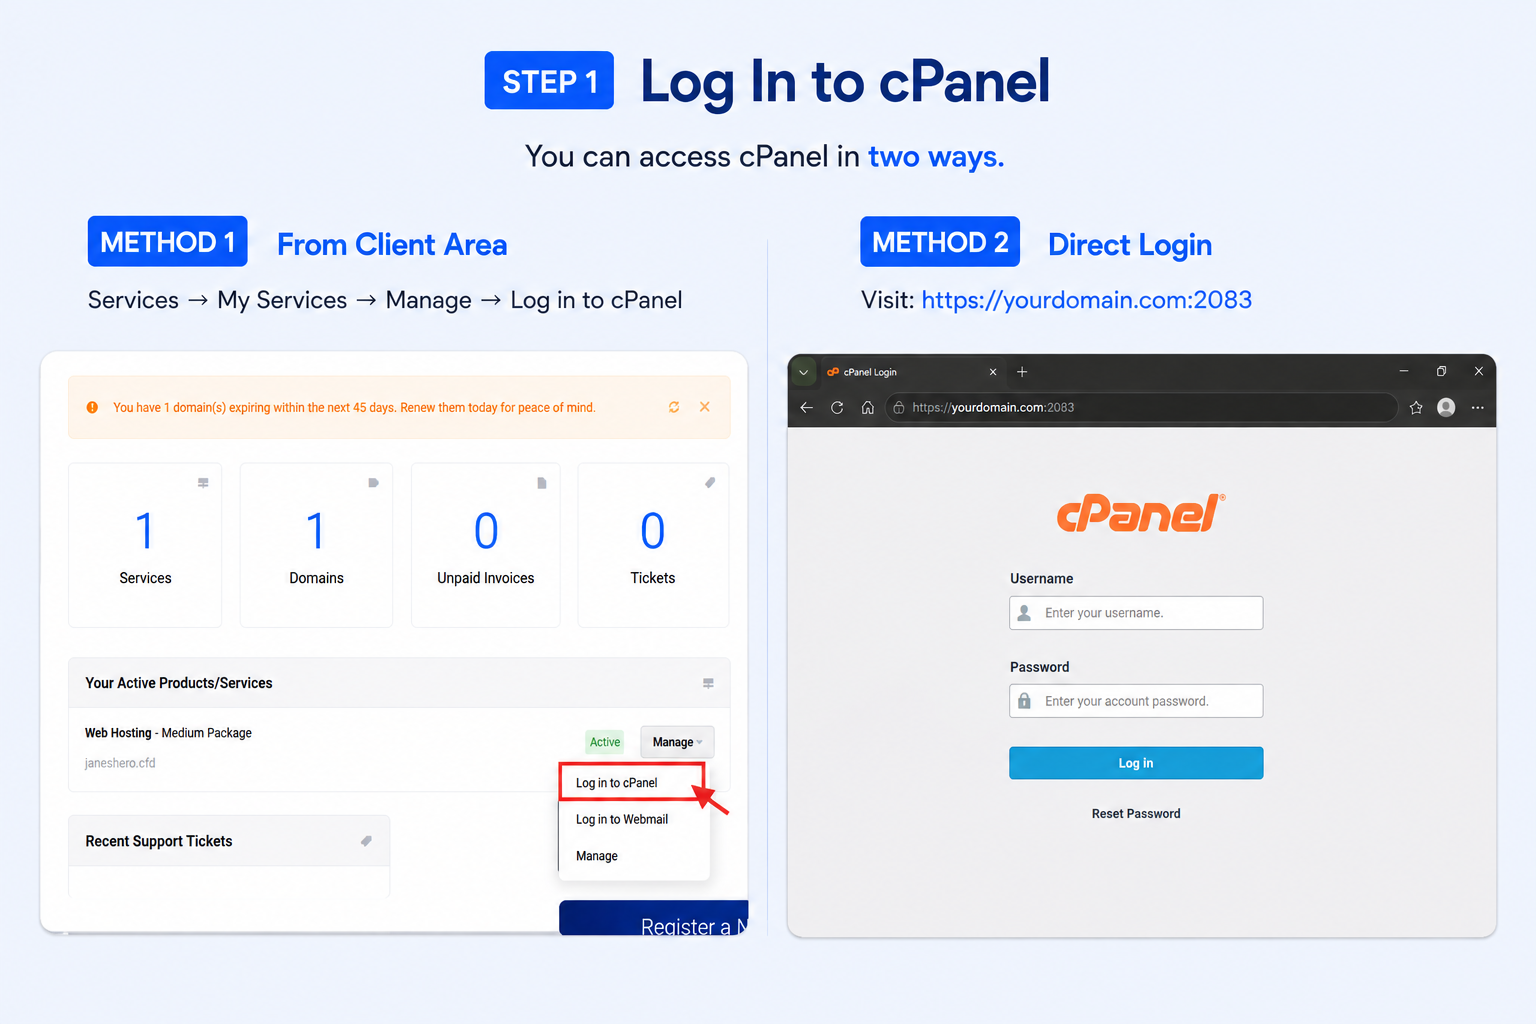
Step 1: Log In to cPanel
Option 1 (Recommended)
Kailash Cloud customers can access cPanel from the client area.
Log in to your account and go to:
Services → My Services → Manage → Log in to cPanel
Option 2
You may also access cPanel directly by visiting:
https://yourdomain.com:2083Replace yourdomain.com with your actual domain name.
Enter your cPanel username and password to continue.
Step 2: Open Softaculous Apps Installer
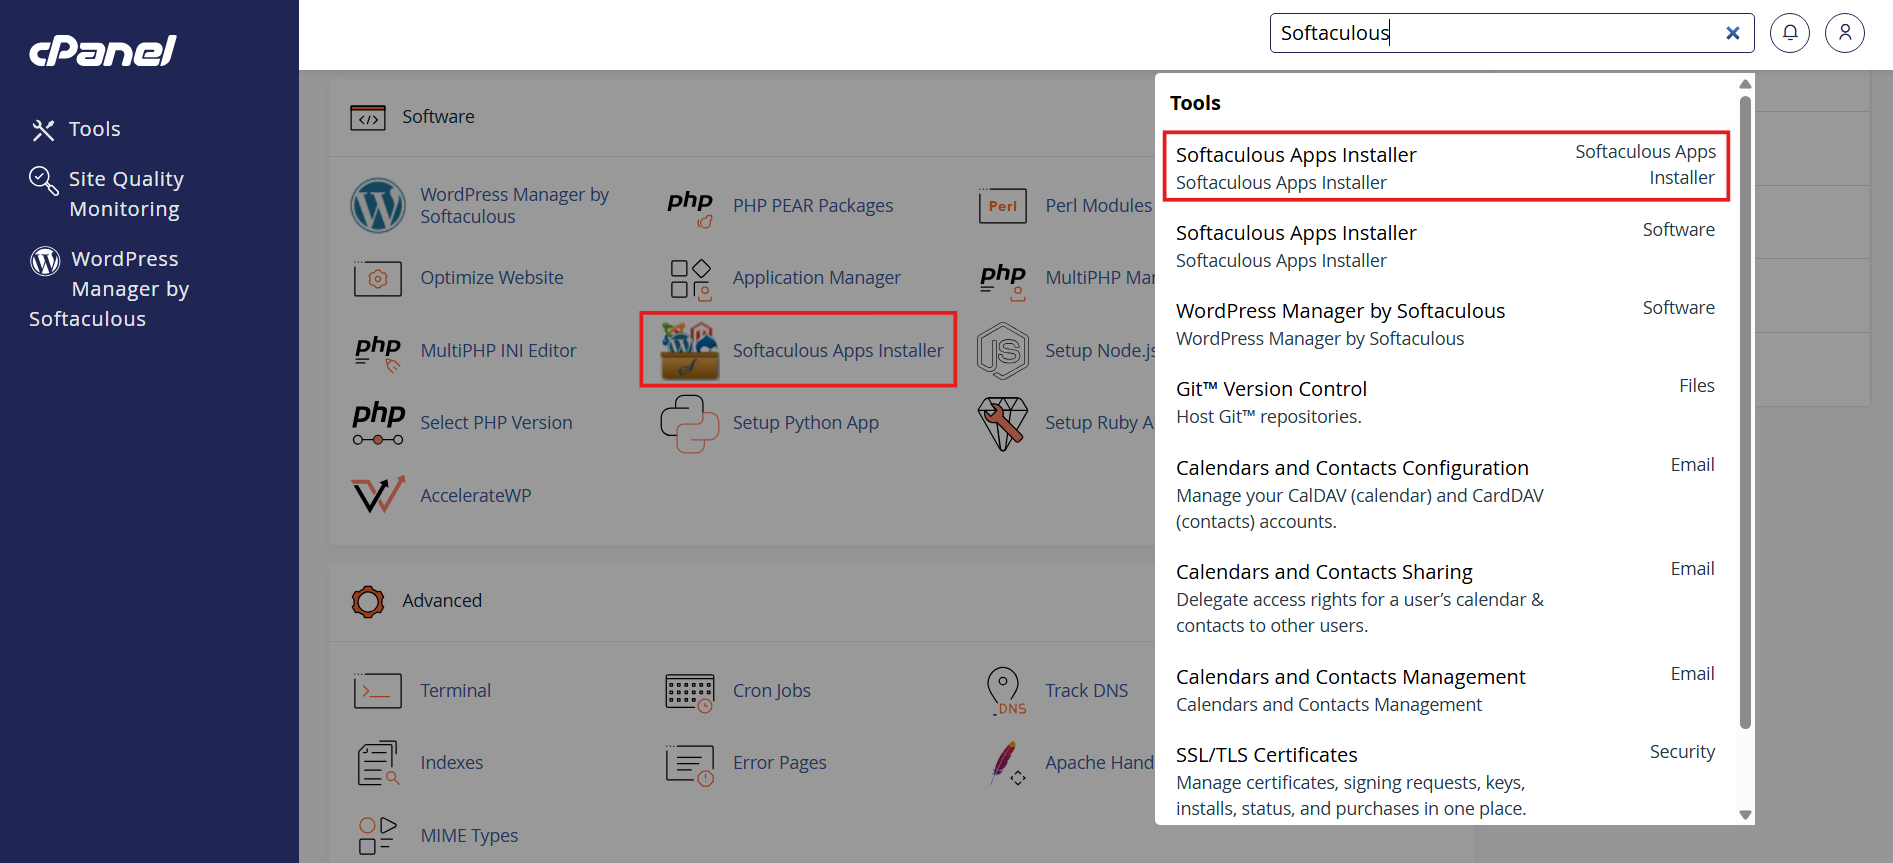
After logging in to cPanel, scroll to the Software section.
Click Softaculous Apps Installer.
You can also use the cPanel search bar and search for Softaculous.
Depending on your cPanel layout, WordPress may appear directly under a section called Softaculous Apps Installer.
Step 3: Select WordPress
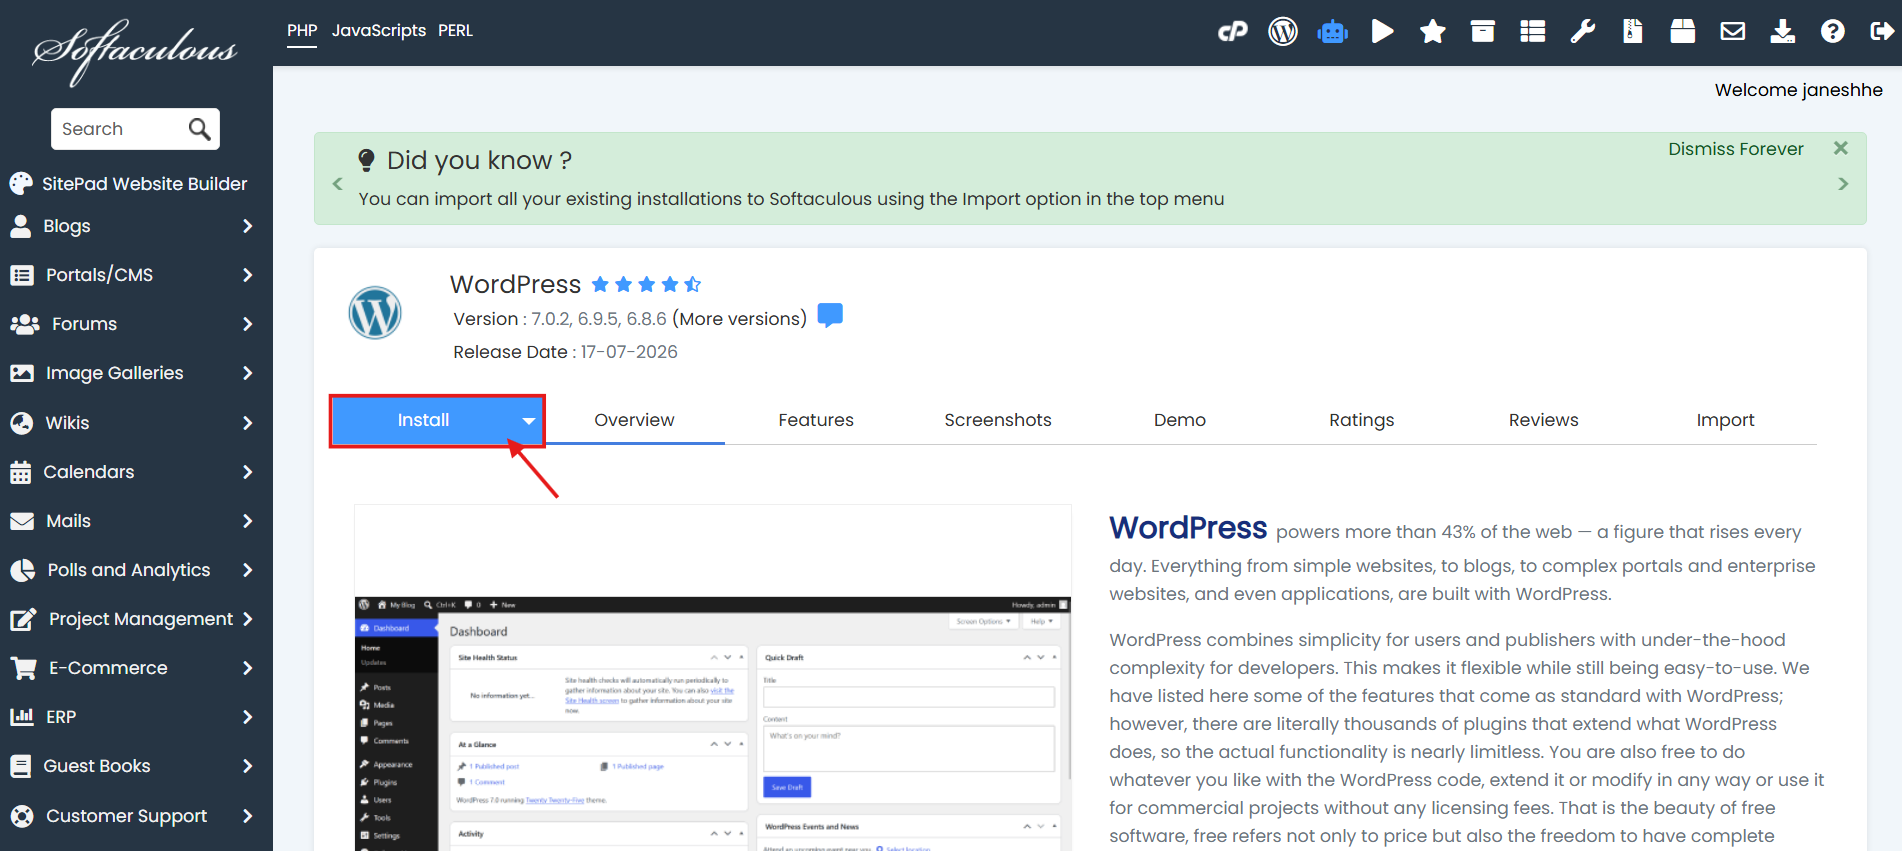
Inside Softaculous, choose WordPress from the list of available applications.
You will see an overview of WordPress, including its features, screenshots and available version.
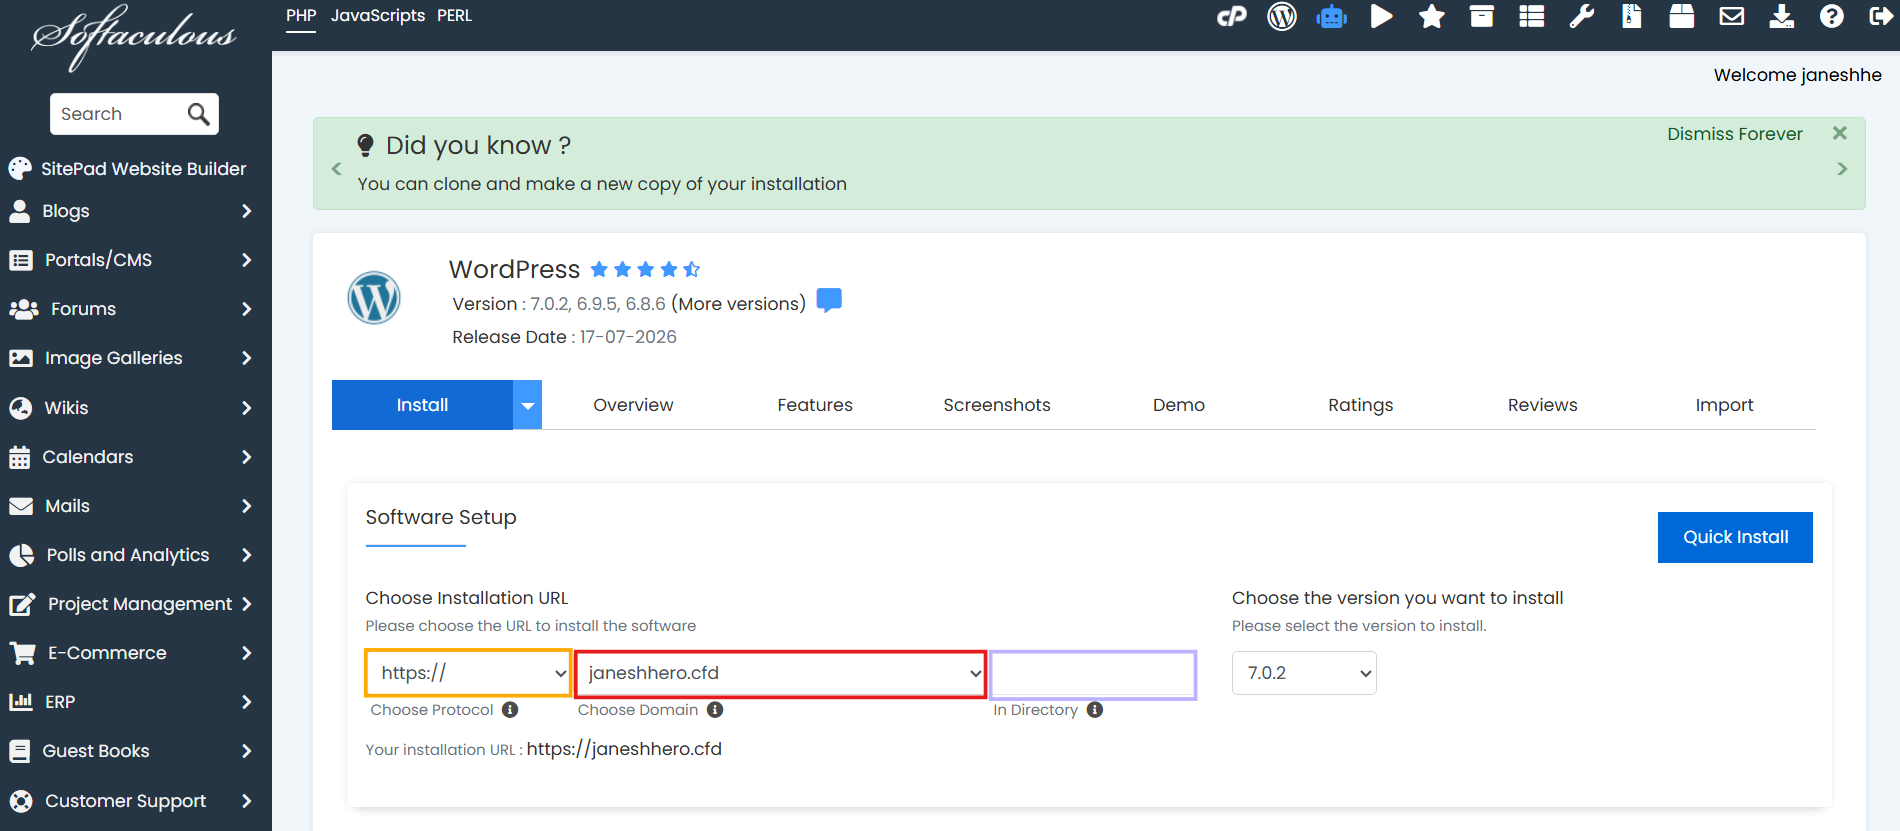
Click Install to open the installation form.
Step 4: Choose the Installation URL
Softaculous will ask where you want to install WordPress.
Choose the Protocol
Select: https://
If your website uses both www and non www versions, choose the version you want to use permanently.
For example:
https://yourdomain.com
or:
https://www.yourdomain.com
For most websites, the non-www version is shorter and easier to use. Either option is acceptable as long as you use it consistently.
Choose the Domain
Select the Domain where you want to install WordPress.
Make sure you select the correct domain if your cPanel account contains multiple domains or subdomains.
Check the Directory Field
Default Value by Softaculous is : wp
Remove this value when you want the website to open directly at:
https://yourdomain.com
The directory field should remain empty for a main-domain installation.
Only enter a directory such as blog when you intentionally want WordPress to open at:
https://yourdomain.com/blog
Leaving wp in the directory by mistake will install the website at:
https://yourdomain.com/wp
Step 5: Enter Your Website Details
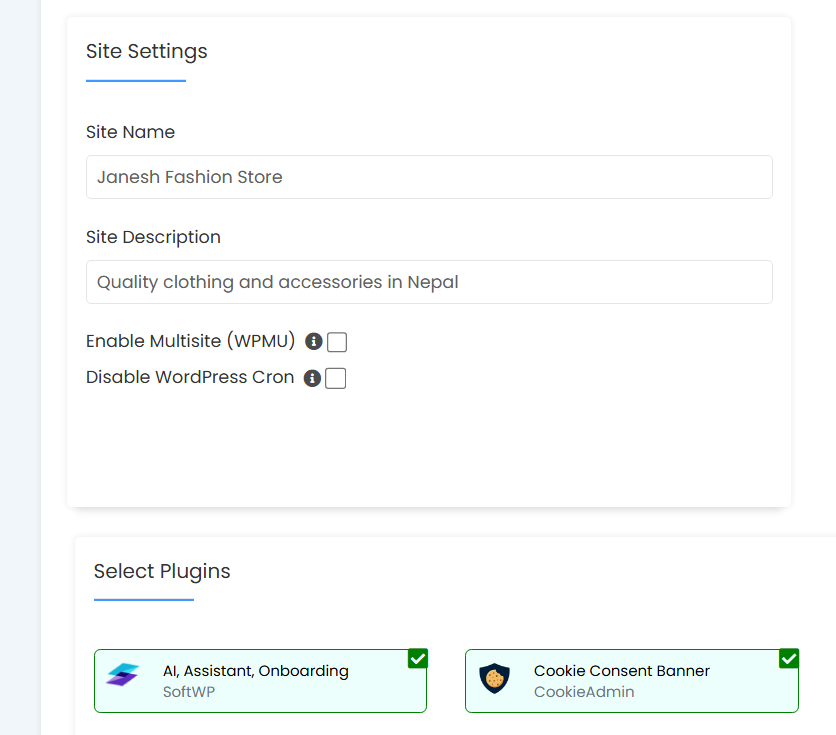
Under Site Settings, enter the name and description of your website.
Site Name
Enter your business, brand or website name.
For example: Janesh Fashion Store
Site Description
Add a short description of your website.
For example:
Quality clothing and accessories in Nepal
You can change the site name and description later from the WordPress dashboard.
Softaculous may also offer options such as:
- Enable Multisite
- Disable WordPress Cron
Most beginners should leave these options unchanged.
WordPress Multisite is only needed when you plan to manage several connected websites from one WordPress installation.
Step 6: Create Your WordPress Administrator Account
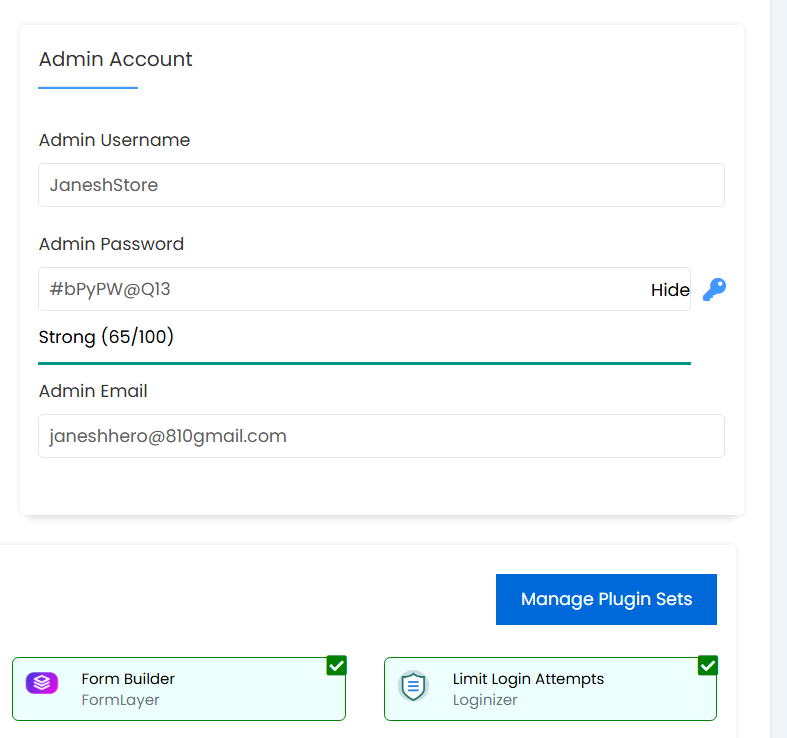
The administrator account gives you complete control over your website.
Enter:
- Admin username
- Admin password
- Admin email
Choose a Secure Username
Do not use predictable usernames such as:
- admin
- administrator
- wordpress
- user
Choose something unique that is difficult for another person to guess.
Create a Strong Password
Use a password containing:
- Uppercase and lowercase letters
- Numbers
- Special characters
- At least 12 characters
Softaculous can automatically generate a secure password for you. Save it in a trusted password manager.
Enter an Active Email Address
Use an email address that you check regularly.
WordPress may use this address for:
- Password resets
- Security notifications
- Administrator messages
- Website update notifications
Check the email carefully before continuing.
Step 7: Choose the Website Language
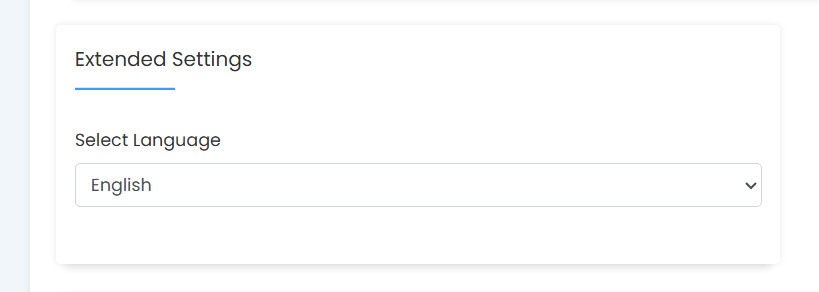
Select the language you want to use for your WordPress dashboard.
Common options include:
- English
- Nepali
- Hindi
- Spanish
- French
The selected language controls the WordPress dashboard, system messages and default interface text.
You can change it later from:
Settings → General → Site Language
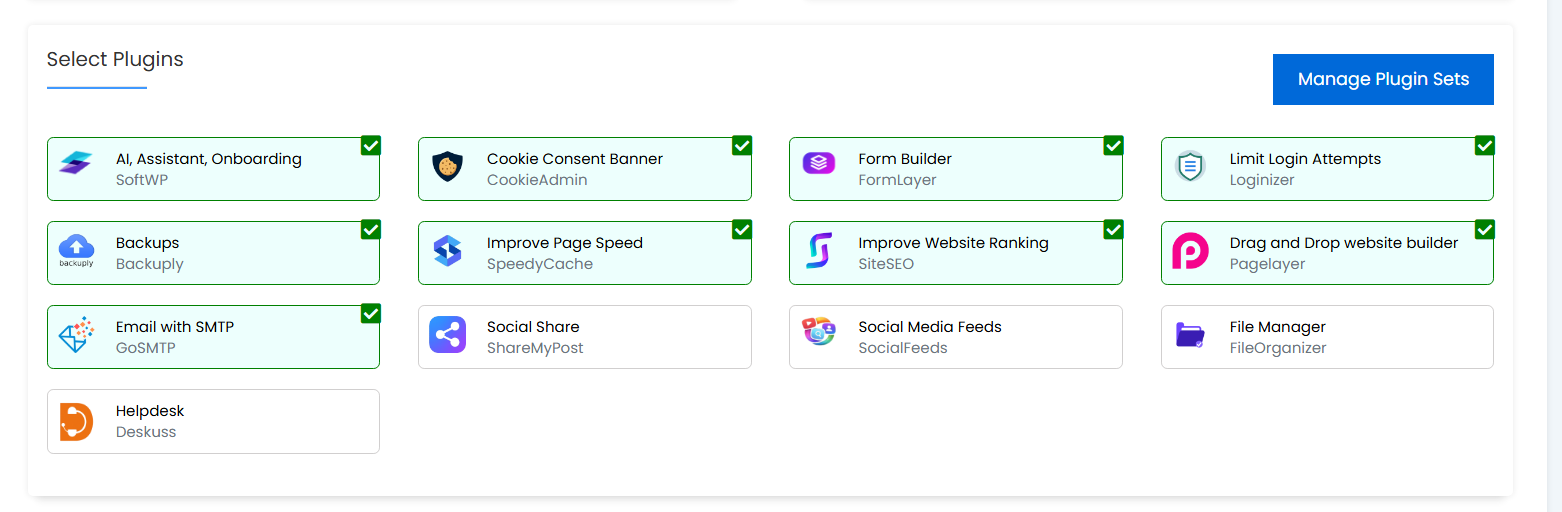
Step 8: Select Plugins and a Theme
Softaculous may offer optional plugins during installation.
You may see options such as:
- Loginizer
- Limit Login Attempts
- Classic Editor
- Contact form plugins
- Page builders
Install only the plugins you need. You can always install additional plugins later from the WordPress dashboard.
Softaculous may also allow you to select a theme. You can choose one during installation or continue with the default WordPress theme.
Avoid installing several plugins and themes before deciding how you want to build the website.
Step 9: Configure Advanced Options
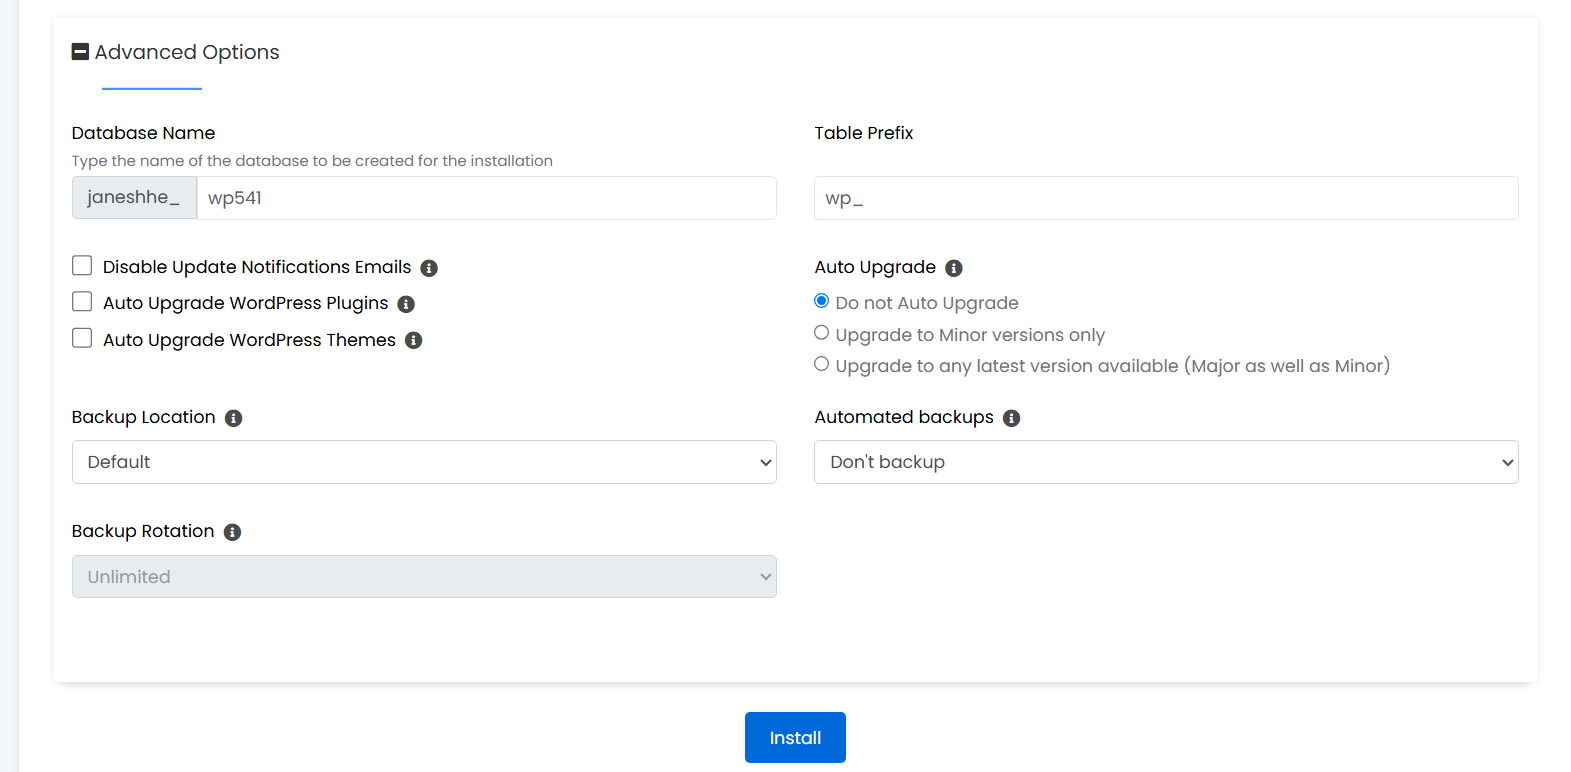
Open Advanced Options if you want to review the database and update settings.
You may see:
- Database name
- Table prefix
- Backup location
- Automatic updates
- Backup frequency
- Backup rotation
Most users can keep the automatically generated database name.
Change the Table Prefix
The default WordPress table prefix is usually: wp_
Softaculous may automatically generate a different prefix. Keeping the generated prefix is suitable for most users.
Enable Automatic Updates
You may enable updates for:
- WordPress core
- Plugins
- Themes
Automatic security and minor WordPress updates are useful for keeping your website protected.
For an established business website or online store, create a backup before major updates. This gives you a way to restore the website if an update causes a compatibility problem.
Configure Automatic Backups
If your hosting package supports Softaculous backups, choose a suitable backup frequency.
A practical setup could be:
- Backup frequency: Once a week
- Backup rotation: Two or three backups
Do not rely on only one backup stored inside the same hosting account. Important websites should also have an external backup.
Step 10: Install WordPress
Review the installation details carefully.
Check:
- Protocol
- Domain
- Directory
- Website name
- Administrator username
- Administrator email
- Language
Click Install.
Softaculous will now create the database, download WordPress and configure the website.
Do not close or refresh the page during installation.
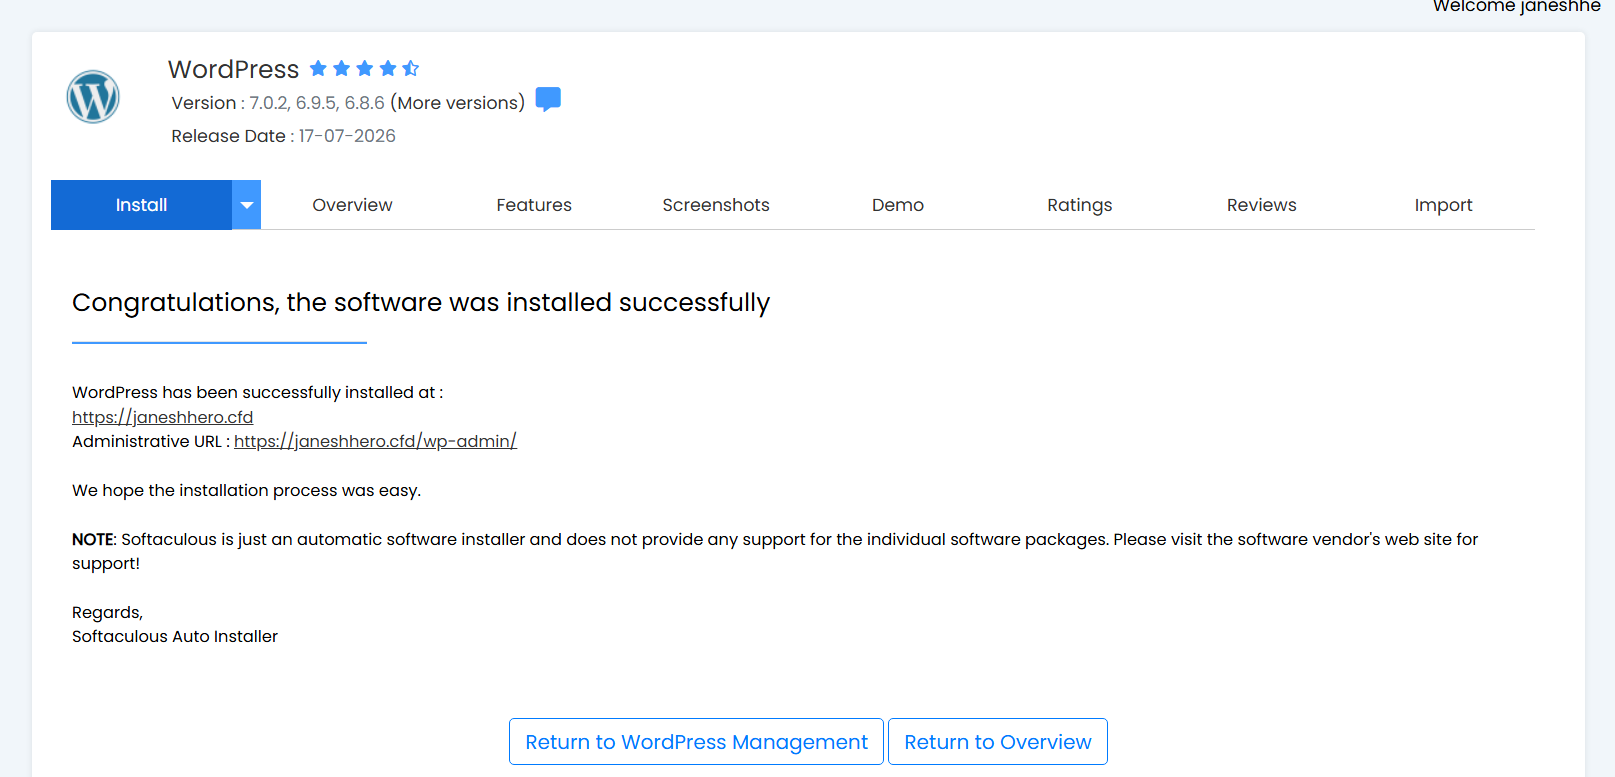
Once the installation is complete, Softaculous will display:
- Your website URL
- Your WordPress admin URL
How to Log In to WordPress
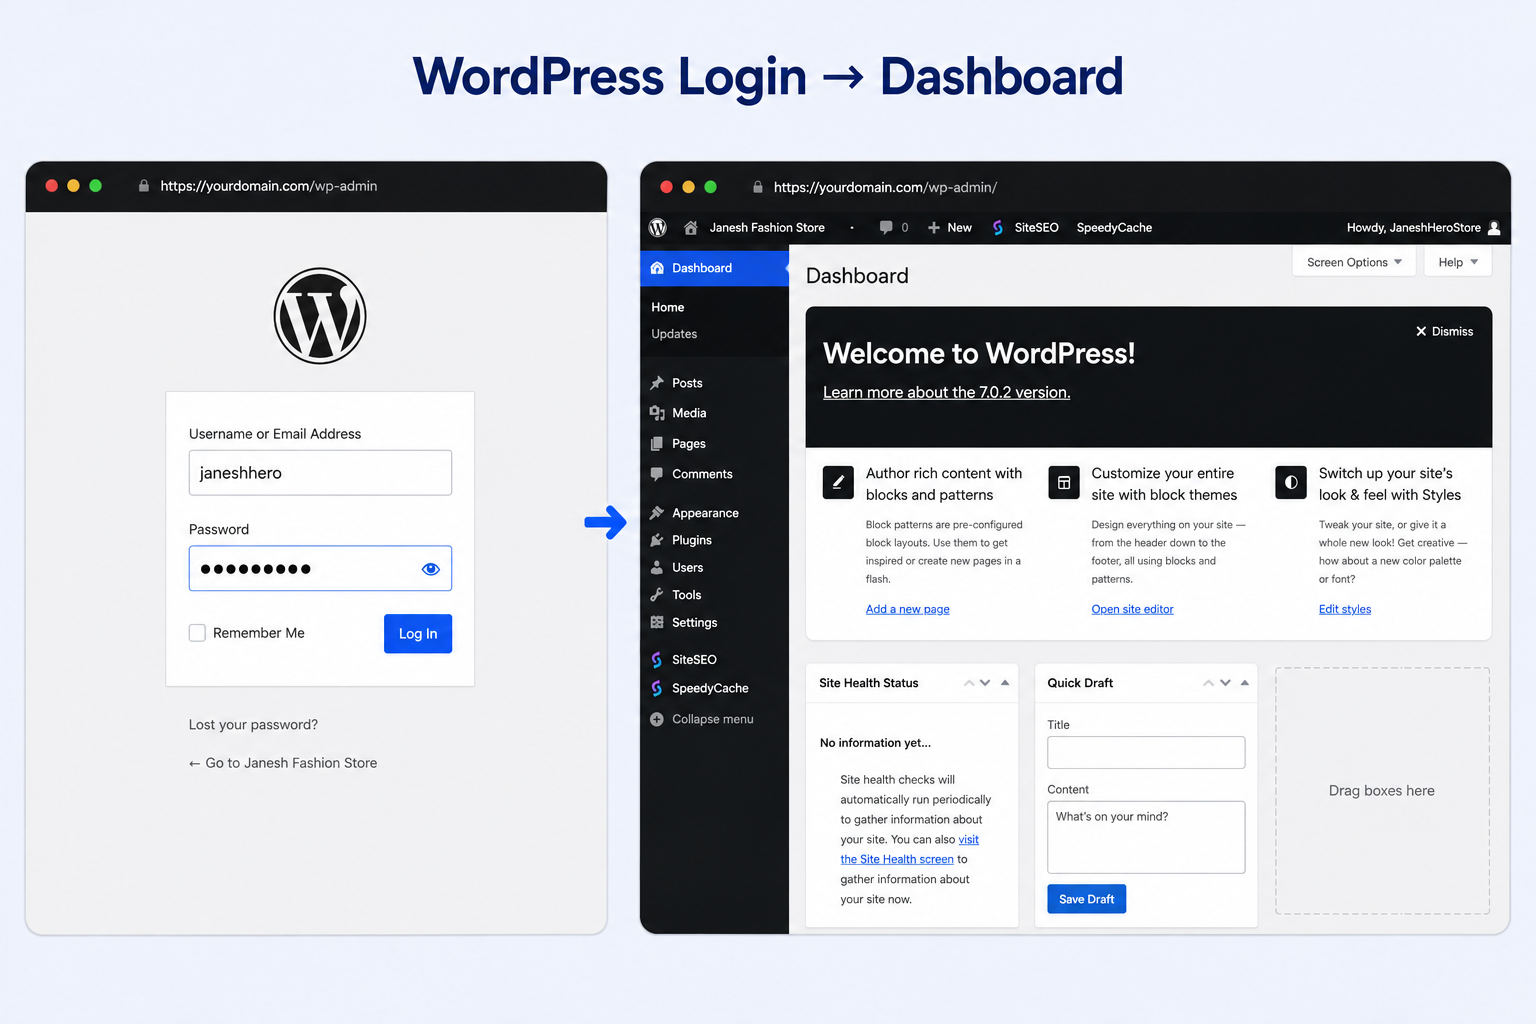
To access your WordPress dashboard, open:
https://yourdomain.com/wp-adminYou can also use:
https://yourdomain.com/wp-login.phpEnter the administrator username and password created during the Softaculous installation.
From the WordPress dashboard, you can:
- Create pages and blog posts
- Install themes
- Add plugins
- Upload images
- Manage users
- Change website settings
- Review comments
Method 2: Install WordPress Manually in cPanel
Softaculous is the easiest option for most users. However, you can install WordPress manually when the automatic installer is unavailable or when you need more control over the files and database.
The official WordPress installation process involves downloading WordPress, creating a database, uploading the files and running the installation script.
Step 1: Download WordPress
Download the latest WordPress ZIP file from the official WordPress website.
Do not download WordPress from unknown or unofficial websites. Modified files may contain malware or unwanted code.
Step 2: Upload WordPress to cPanel
Log in to cPanel and open File Manager
Navigate to the document root of your domain.
For the primary domain, this is usually:
public_html
Click Upload and select the WordPress ZIP file from your computer.
Once the upload is complete:
- Return to File Manager.
- Select the ZIP file.
- Click Extract.
- Open the extracted
wordpressfolder. - Select all files and folders.
- Move them directly into
public_html.
The following folders should appear directly inside public_html:
wp-adminwp-contentwp-includes
Do not leave the files inside public_html/wordpress unless you want the website to open at:
https://yourdomain.com/wordpress
Step 3: Create a MySQL Database
Return to the main cPanel dashboard and open MySQL Database Wizard.
It may also appear as Database Wizard.
Create a new database and save its complete name.
Next, create a database user and a strong password.
Assign the user to the database and select:
All Privileges
Save the following details:
- Database name
- Database username
- Database password
You will need them during the WordPress setup.
Step 4: Run the WordPress Installation
Open your domain in a browser:
https://yourdomain.com
Choose your preferred language.
WordPress will ask for:
- Database name
- Database username
- Database password
- Database host
- Table prefix
The database host is normally:
localhost
Keep this value unless your hosting provider has given you a different database host.
Submit the information and run the installation.
Step 5: Create the Administrator Account
Enter:
- Website title
- Administrator username
- Strong password
- Administrator email
WordPress may also show a search engine visibility option.
Leave this option unchecked when your website is ready to appear in search results.
You can enable it temporarily if the website is still under development, but remember to disable it before launching.
Click Install WordPress.
Your manual WordPress installation is now complete.
Conclusion
After installation, configure your permalinks, confirm HTTPS, remove the default content, install a lightweight theme and create a backup.
Your WordPress website will then be ready for design, content and visitors.
If you’re building a small business website, portfolio, or blog, shared web hosting or WordPress hosting is usually the best place to start.
However, as your website grows, you may notice slower loading times, higher resource usage, or occasional performance issues. especially if you’re running an online store, a membership website, or using many plugins.
In those cases, upgrading to a Virtual Private Server (VPS) gives you dedicated resources, better performance, and greater control over your hosting environment.
Common WordPress Installation Problems
WordPress Opens Inside /wp or /wordpress
This happens when a directory was entered during the Softaculous installation or when the WordPress folder was uploaded without moving its contents.
For a new installation, remove the incorrect installation and reinstall WordPress with the directory field empty.
Create a backup before deleting an existing website.
Error Establishing a Database Connection
This error normally means WordPress cannot connect to the database.
Check:
- Database name
- Database username
- Database password
- Database host
- Database user privileges
For manual installations, these details are stored inside the wp-config.php file.
The Website Shows a Default cPanel Page
Your browser may be displaying a cached page, or a default index.html file may still exist inside public_html.
Clear the browser cache and check the domain directory through File Manager.
The Website Shows “Not Secure”
The SSL certificate may not be active, or WordPress may still be using HTTP URLs.
Confirm that:
- The SSL certificate is active.
- WordPress Address uses HTTPS.
- Site Address uses HTTPS.
- HTTPS redirection is enabled.
Softaculous Is Missing
Softaculous may not be available with every hosting provider or hosting plan.
Search cPanel for:
- Softaculous Apps Installer
- WordPress Manager
- Site Software
- WordPress Installer
When no automatic installer is available, use the manual installation steps explained above.
The WordPress Login Page Does Not Open
Try:
https://yourdomain.com/wp-login.php
If it still does not open:
- Clear your browser cache.
- Confirm WordPress is installed in the correct directory.
- Check whether the domain points to the correct hosting account.
- Temporarily disable recently installed plugins.
- Review the
.htaccessfile.
Frequently Asked Questions
How do I install WordPress on cPanel?
Log in to cPanel, open Softaculous Apps Installer, select WordPress, click Install Now, choose your domain, create an administrator account and click Install.
Is Softaculous free to use?
Softaculous is included with many cPanel hosting packages. Whether it is available depends on the hosting provider and plan.
Should I remove wp from the directory field?
Yes. Remove wp when you want WordPress to open directly on your main domain.
Leave the directory field empty for:
https://yourdomain.com
Keep a directory only when you intentionally want a URL such as:
https://yourdomain.com/wp
What is the WordPress admin login URL?
The default login URL is:
https://yourdomain.com/wp-admin
Do I need to create a database when using Softaculous?
No. Softaculous automatically creates and connects the database during installation.
You only need to create a database yourself when installing WordPress manually.
Can I install WordPress on a subdomain?
Yes. Add the subdomain to cPanel first, and then select it from the domain list inside Softaculous.
For example:
https://shop.yourdomain.com
Can I install more than one WordPress website in cPanel?
Yes, provided your hosting plan supports multiple domains or subdomains.
Each WordPress installation should use a separate domain, subdomain or directory.
Can I move an existing WordPress website to Kailash Cloud?
Yes. You can migrate the files and database manually or use a WordPress migration plugin.
Read this article for proper guide to migrate the wordpress site to shared web hosting.